
How to Install a Door Stopper?
How to install a door stopper?
A door stopper might be small, but it plays a big role in protecting your walls, furniture and doors from damage. If you’re tired of scuff marks on your walls and the sound of slamming doors, a well-placed door stopper is what you need.
Not sure which one to choose or how to install it? This guide breaks down the different types, how to install them and what to consider to find the best fit for your home.
How to choose the right type of door stopper
Let’s talk through all the different types of door stoppers on the market and what they work best for, so you can make the best choice for your space:
- Wall-mounted: Fixed to the wall behind the door, these stoppers absorb impact and prevent dents or scratches. They’re a discreet choice if you want protection without a visible stopper on the floor.
- Floor-mounted: Installed directly into the floor, these are built for durability and are ideal for heavy doors and high-traffic areas of your home. Choose floor-mounted door stoppers if you want something sturdy that won’t shift over time.
- Spring: One of the most common types, these door stoppers mount to the baseboard and flex on impact to absorb force. They are the easiest to install, which helps lower their price, and a functional and practical option.
- Magnetic: These stoppers use a magnetic catch to keep doors open. They’re perfect for rooms like kitchens where doors often need to stay propped at key times.
- Hinge pin: Mounted on a hinge, these stoppers don’t need any drilling and are a minimalist, damage-free way option. If you don’t want to drill into your wall or floor, the hinge pin door stop is installed directly onto the hinge.
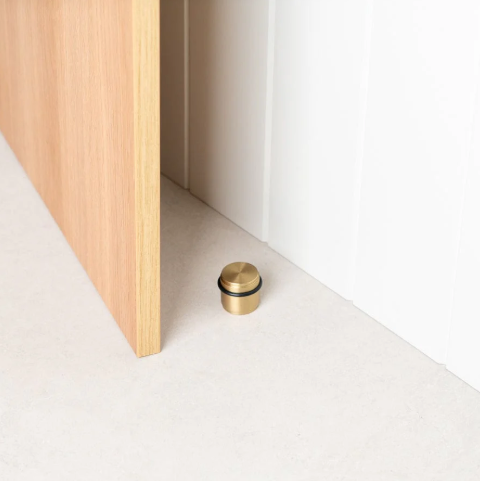
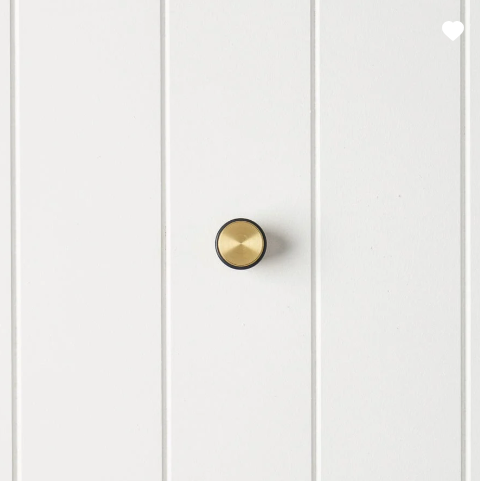
Pictured: Door Stopper Brushed Brass
After narrowing down which door stop will work for your home, the next step is finding a finish that fits your style. Yabby’s door stoppers are electroplated or PVD, meaning they won’t tarnish with use. With options like Warm Brushed Nickel, Brushed Brass and Antique Brass, there is bound to be something for you.
Step-by-step guide for installing a door stopper
You’ve got your door stopper – now it’s time to put it in place. Here is your DIY-friendly guide on door stopper installation.
What you will need:
- Your door stopper
- Drill (for all options but the hinge pin)
- Screws (usually provided with the stopper)
- Pencil, marker or strong tape
- Screwdriver
Steps:
- Choose the location: Pick where your door stopper will be the most effective in your home. For a wall-mounted stopper this will be where the door handle or edge would hit the wall. For floor-mounted ones this will be where the door is fully opened but before it can hit the wall or furniture.
- Mark the spot: Use your pencil or masking tape to mark where you will place the stopper. Make sure you double-check the alignment by gently opening the door and checking it makes contact with the stopper at the right point before you install it.
- Install the stopper: This will depend on the type of stopper you’ve chosen.
- Wall mounted: Drill a small pilot hole in the marked spot and screw the stopper into place.
- Floor mounted: Drill into the floor at your mark, then secure into place with the provided pins or screws.
- Spring / Hinge pin: Screw into the baseboard or replace the existing hinge pin with the stopper.
- Test: Open and close the door slowly to check the stopper's alignment. If needed, make adjustments to ensure the door falls where you want it to.
Our best tips for a secure and long-lasting installation
Your new door stopper should last years, but a few simple steps can help it stay secure and effective over time.
- Use a wall plug: For a wall-mounted stopper, use a wall plug before screwing it in. This adds extra stability and will keep it from loosening over time.
- Check for obstructions: Make sure there are no hidden pipes or electrical wires in the area before drilling. As a rule, avoid drilling directly above, below or directly to the side of outlets, light switches, sinks and toilets unless you’ve checked the area. You can check your home’s blueprints or use tools like a stud finder or voltage tester.
- Re-tighten screws: Over time and with use, screws might come loose. Check occasionally and tighten if needed to keep the stopper secure.
A well-installed and maintained door stopper can keep your walls, doors and furniture in top condition for much longer.
Ready to choose your doorstopper?
With so many options available, it’s all about choosing the right door stopper type and finish for your space. Explore the Yabby range to find the perfect fit and get it delivered in no time. With what you’ve learned in this guide, you’ll have your new door stopper installed and ready to go in no time.

Layla Sawyer
Layla is a creative at heart, with an Advanced Diploma in Interior Design and being the Senior Marketing and Ecommerce Coordinator here at Yabby she has a passion for staying up to date with the latest trends within the industry. Known for going down a rabbit hole on Pinterest and being a sucker for a good mood board to kick off any project.